Christmas Candy & Confections Recipes
Fudge, toffee, peppermint bark, and homemade candy gifts.
Homemade candy is one of the most appreciated Christmas gifts you can give — and surprisingly achievable once you understand a few basics. From simple no-bake treats like peppermint bark and chocolate truffles to classic confections like buttery toffee and creamy fudge, these recipes will fill your gift tins with impressive, delicious treats that taste far better than anything store-bought.
There is something special about presenting a beautifully wrapped tin of handmade confections — it shows thoughtfulness and effort that no store-bought gift can match. Whether you are making candy for family gift exchanges, cookie swap additions, or as hostess gifts throughout the holiday season, mastering a few signature confections will make you the hero of every Christmas gathering.
The Magic of Homemade Christmas Candy
The beauty of homemade candy lies not just in the taste, but in the experience of making it. Watching sugar transform into golden caramel, tempering chocolate to a perfect sheen, or swirling peppermint into melted white chocolate — these are the hands-on moments that connect us to generations of holiday candy makers who came before. Many families have treasured candy recipes passed down through generations, and starting your own tradition is easier than you might think.
Christmas candy making has deep roots in holiday traditions around the world. Victorian-era families would gather to make pulled taffy and molded marzipan, while modern celebrations might feature chocolate bark studded with peppermint, salted caramel squares, or classic divinity. The ritual of candy making brings families together — it's less about perfection and more about the shared experience of creating something delicious.
Best Christmas Candies for Beginners
If you've never made candy before, don't let it intimidate you. Start with recipes that don't require candy thermometers or advanced techniques:
- Peppermint Bark — Just melted chocolate, crushed candy canes, and a pan. Genuinely foolproof.
- Chocolate Truffles — Ganache rolled in cocoa powder. Looks fancy, takes 20 minutes of actual work.
- Microwave Fudge — No candy thermometer needed, sets in the refrigerator, always turns out creamy.
Once you master these, you'll have the confidence to tackle recipes that require a bit more precision like English butter toffee and salted caramels. Both require watching temperatures carefully, but the results are absolutely worth the effort — buttery, rich confections that taste like they came from a gourmet chocolate shop.
Building Your Candy-Making Toolkit
You don't need a professional kitchen to make beautiful Christmas candy, but a few tools make the process much easier:
- Candy thermometer — Essential for toffee, caramels, and anything that specifies a temperature. Digital instant-read thermometers work great.
- Heavy-bottomed saucepan — Distributes heat evenly and prevents hot spots that burn sugar.
- Silicone spatula — Heat-resistant and flexible for stirring and scraping.
- Parchment paper or silicone mats — Non-stick surfaces for cooling candy without the mess.
- Sharp knife or pizza cutter — For cutting fudge and toffee into clean squares.
Quality ingredients matter more in candy than almost any other type of baking. Use real butter, high-quality chocolate, pure vanilla extract, and fresh nuts. With so few ingredients, each one needs to shine.
Understanding Candy Temperatures and Stages
Successful candy making is all about controlling sugar temperature. Different temperatures create different textures — from soft fondant to hard brittle. Here are the most common stages you will encounter in Christmas candy recipes:
- Soft Ball (235-240°F) — Fudge and fondant territory. Sugar mixture forms a soft, flexible ball in cold water.
- Firm Ball (245-250°F) — Caramels live here. Firmer than soft ball but still pliable.
- Hard Ball (250-265°F) — Divinity and marshmallows. Forms a hard ball that holds its shape but is still somewhat pliable.
- Soft Crack (270-290°F) — Taffy and butterscotch. Separates into threads that bend before breaking.
- Hard Crack (300-310°F) — Toffee and peanut brittle. Forms hard, brittle threads that snap cleanly.
Always use a candy thermometer and test it before starting — boil water and make sure it reads 212°F at sea level. A few degrees can make the difference between perfect toffee and burnt sugar.
Common Candy-Making Mistakes and How to Fix Them
Even experienced candy makers encounter problems. Here is how to troubleshoot the most common issues:
- Grainy fudge — Caused by sugar crystallization. Avoid stirring once mixture boils, and wash down pan sides with a wet brush.
- Seized chocolate — Water is the enemy. Make sure all utensils are completely dry, and avoid steam from double boilers.
- Sticky candy that won't set — Undercooked. The sugar didn't reach high enough temperature. Use a calibrated thermometer.
- Burnt sugar taste — Too high heat or cooked too long. Use medium heat and watch carefully once temperature climbs above 250°F.
- Toffee separating — Butter and sugar emulsion broke. Stir constantly at the beginning, then stop stirring once it boils.
Don't throw out failures — you can often repurpose them. Grainy fudge becomes ice cream topping. Seized chocolate can be thinned with warm cream for hot fudge sauce. Hard-crack disasters can be crushed for ice cream mix-ins.
Packaging Homemade Candy as Gifts
Half the joy of homemade candy is giving it away. Here's how to package your confections beautifully:
- Decorative tins — Layer different candies between sheets of wax paper for a professional look.
- Mason jars — Perfect for truffles, caramels, or layered bark pieces. Tie with festive ribbon.
- Cellophane bags — Simple and elegant. Fill with candy, tie with ribbon, add a handwritten tag.
- Small gift boxes — Line with tissue paper, arrange candy thoughtfully, close with a sticker seal.
Always include a label with the candy name and any storage instructions. Most chocolate-based candies should be stored at cool room temperature and consumed within 2-3 weeks for best quality. For more creative packaging ideas, check out our gift wrapping ideas to make your homemade treats look as impressive as they taste.
Candy-Making Safety Tips
Sugar reaches extremely high temperatures — well above boiling water. Follow these safety rules every single time:
- Never leave boiling sugar unattended — Temperatures climb fast and burnt sugar is both dangerous and disgusting.
- Keep children and pets away — Hot sugar causes serious burns and sticks to skin.
- Use a deep pot — Sugar mixtures bubble up dramatically. Your pot should be at least twice as deep as the ingredients.
- Don't taste hot candy — Wait until it cools. Hot sugar will burn your mouth badly.
- Keep a bowl of ice water nearby — If you do get sugar on your skin, plunge immediately into ice water.
- Wear long sleeves — Protects arms from splatters when stirring hot mixtures.
Candy making is safe when you respect the process. Take your time, stay focused, and never rush.
Creating a Candy-Making Tradition
Some of the best Christmas memories happen in the kitchen with flour on your nose and chocolate on your fingers. Making candy together — whether with kids, partners, or friends — creates traditions that last far longer than the candy itself. Set aside a weekend afternoon in early December, put on some Christmas music, and work through a few recipes together. The house will smell amazing, you'll laugh at the inevitable mishaps, and you'll end up with beautiful gifts and even better memories.
Pair your candy creations with our Christmas cookie recipes for the ultimate holiday gift box, or complement your confections with a mug of festive hot cocoa. Looking to expand your holiday recipe repertoire? Explore our Christmas dessert recipes for showstopping sweets beyond candy and cookies.
🎄 Related Christmas Content

Classic Chocolate Truffles
Luxuriously smooth, melt-in-your-mouth chocolate truffles made with just three base ingredients. These elegant confections are surprisingly easy to make and perfect for holiday gift-giving. Customize with endless flavor variations from peppermint to champagne.
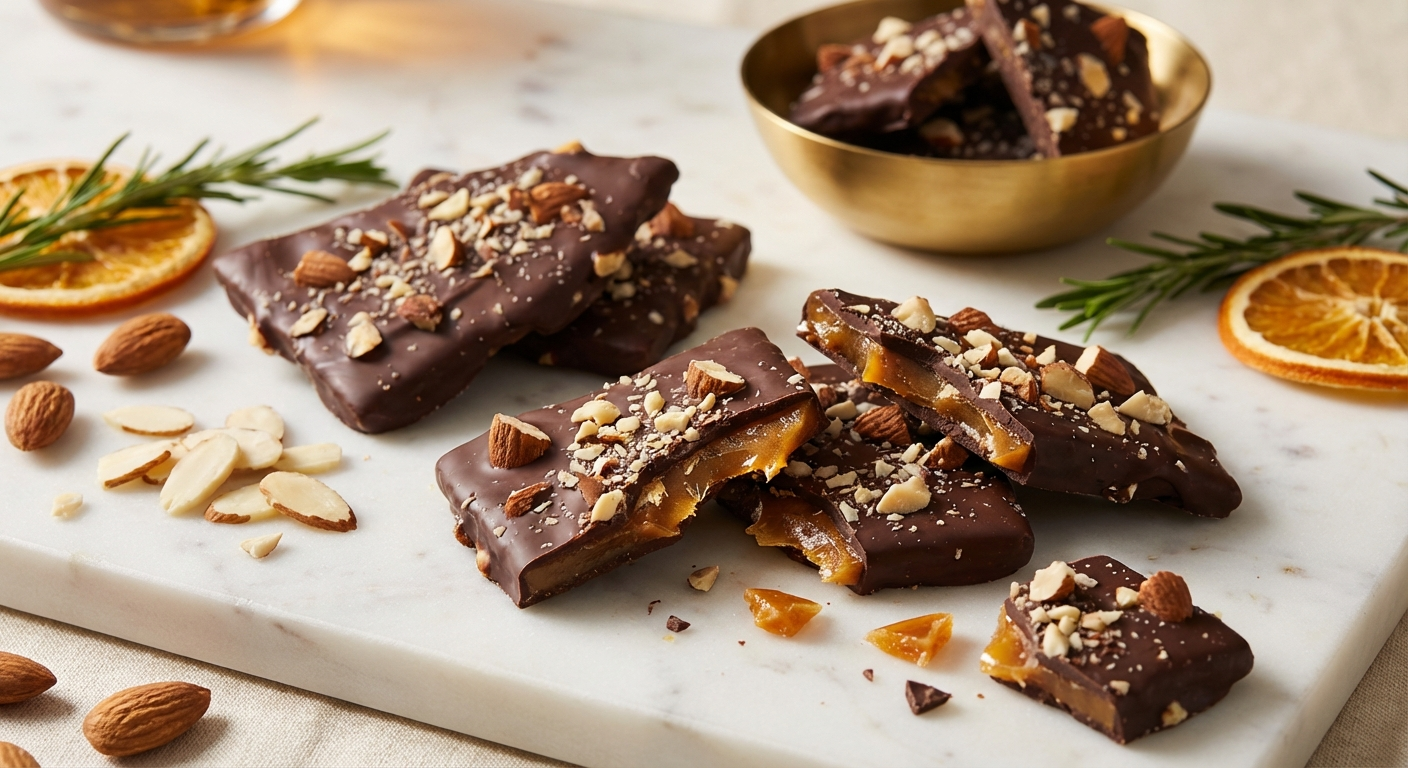
English Butter Toffee
Crisp, buttery toffee with a deep caramel flavor, covered in rich chocolate and crunchy toasted almonds. This classic confection shatters with a satisfying snap and makes an impressive homemade gift that rivals any gourmet candy shop.
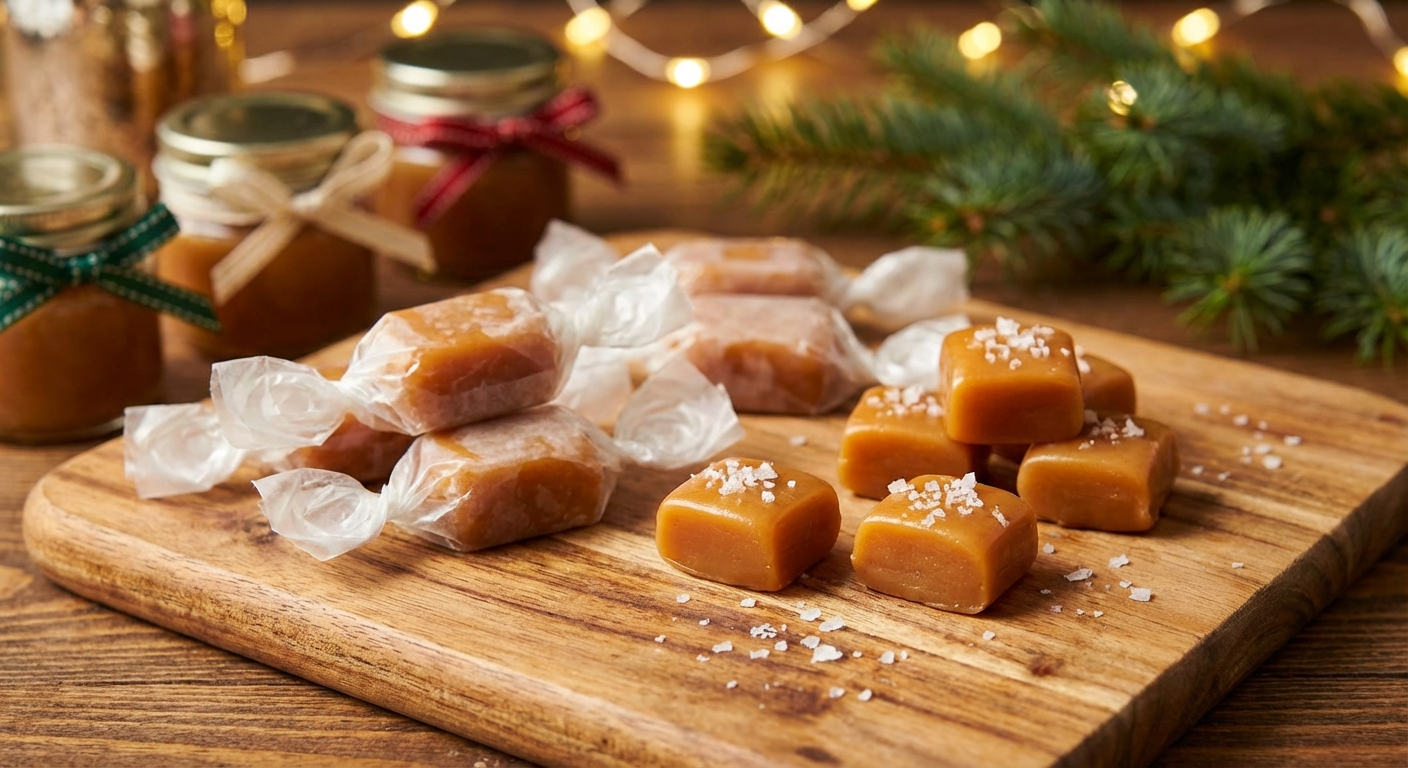
Soft Salted Caramels
Buttery, chewy caramels with a perfect balance of sweet and salty that melt on your tongue. Wrapped in wax paper twists, these handmade confections make stunning gifts that disappear within minutes of being opened.
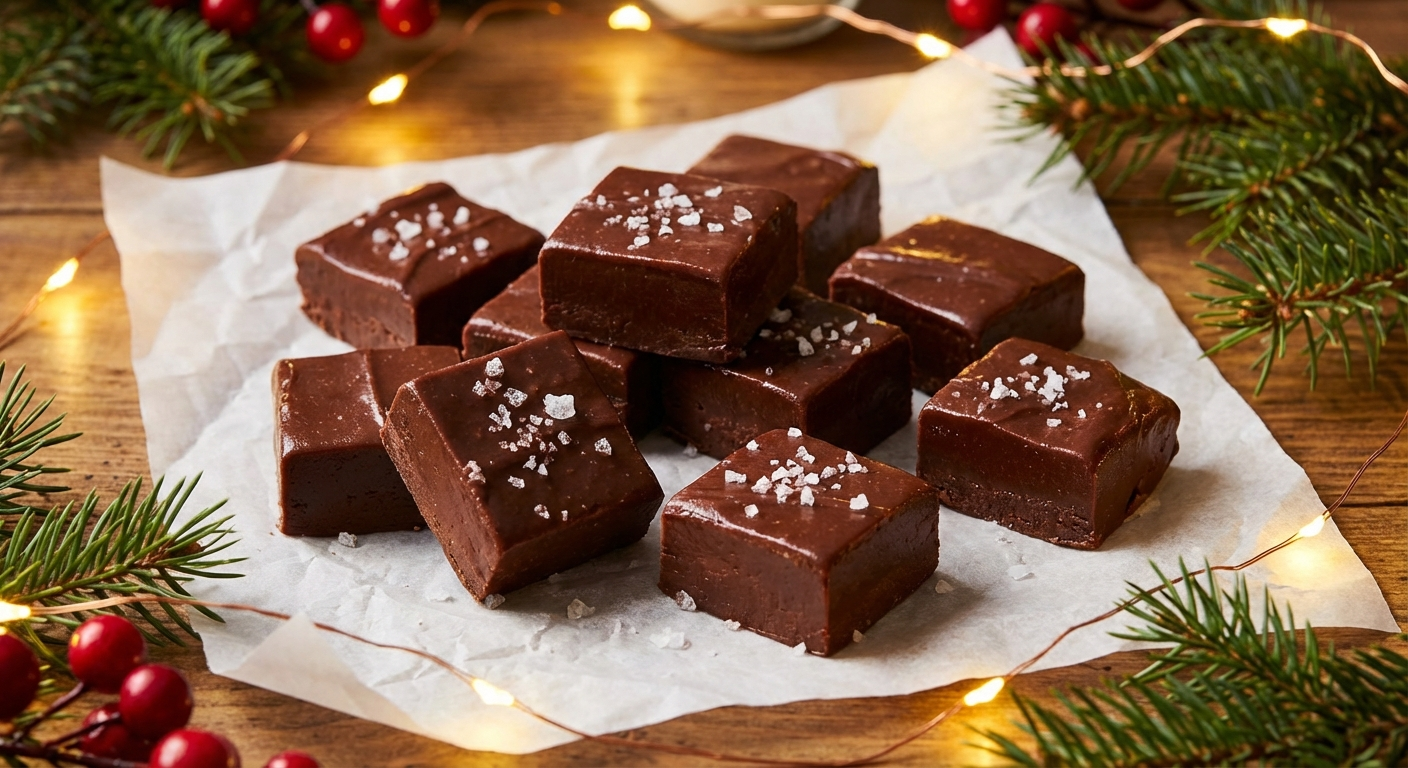
Classic Christmas Fudge
Smooth, rich, and melt-in-your-mouth chocolate fudge made with just a handful of pantry ingredients. This foolproof recipe uses sweetened condensed milk for a creamy, perfectly set fudge every single time. A beloved Christmas tradition that is wonderful for gifting.

Peppermint Bark
Layers of rich dark chocolate and creamy white chocolate topped with crushed candy canes create this iconic Christmas confection. Peppermint bark is incredibly easy to make, looks absolutely gorgeous, and makes a wonderful homemade holiday gift.
💡 Pro Tips for Candy & Confections
- ✓ Use a candy thermometer for any recipe that specifies a temperature — guessing leads to failures.
- ✓ Don't stir caramel or toffee once it starts boiling unless the recipe specifically says to.
- ✓ Work on a dry day — humidity is the enemy of candy making and can cause crystallization.
- ✓ Line pans with parchment paper or silicone mats for easy removal and cleanup.
- ✓ Use high-quality chocolate and butter — candy has few ingredients, so each one matters.
- ✓ Have all ingredients measured and ready before starting — candy making moves fast once you begin.
- ✓ Cool candy completely before cutting — rushing leads to messy, uneven pieces.
- ✓ Toast nuts before adding to candy for extra flavor and crunch.
- ✓ Store different candy types separately — moisture from one can affect another's texture.
- ✓ Add a tiny pinch of salt to sweet candies to enhance flavor complexity.
- ✓ Use a heavy-bottomed pot for even heat distribution when cooking sugar.
Never miss a Christmas idea
Get daily gift guides, recipes, and holiday inspiration delivered to your inbox.