Free Printable Christmas Gift Tags
Download and print eight classic Christmas gift tags on one sheet — tree, holly, star, and snowflake designs with To and From lines. Free, no signup, print at home on cardstock.
Materials Needed
- Our free gift tag sheet (download link below)
- White or cream cardstock, 8.5x11 inches (65 lb or heavier)
- Home printer (color, though the designs also work in grayscale)
- Scissors or a paper trimmer
- Single hole punch
- Baker's twine, ribbon, or jute string
- Fine-tip pen for writing names
Store-bought gift tags cost more per tag than the paper they're printed on, and they always run out on the last three presents. This free printable Christmas gift tag sheet gives you eight tags per page — print as many sheets as you need, cut, punch, and tie.
Download the free gift tag sheet
Eight tags per page · US Letter · no email required
Download the printable (SVG)Opens in your browser — use File → Print, or right-click and save.
What's on the Sheet
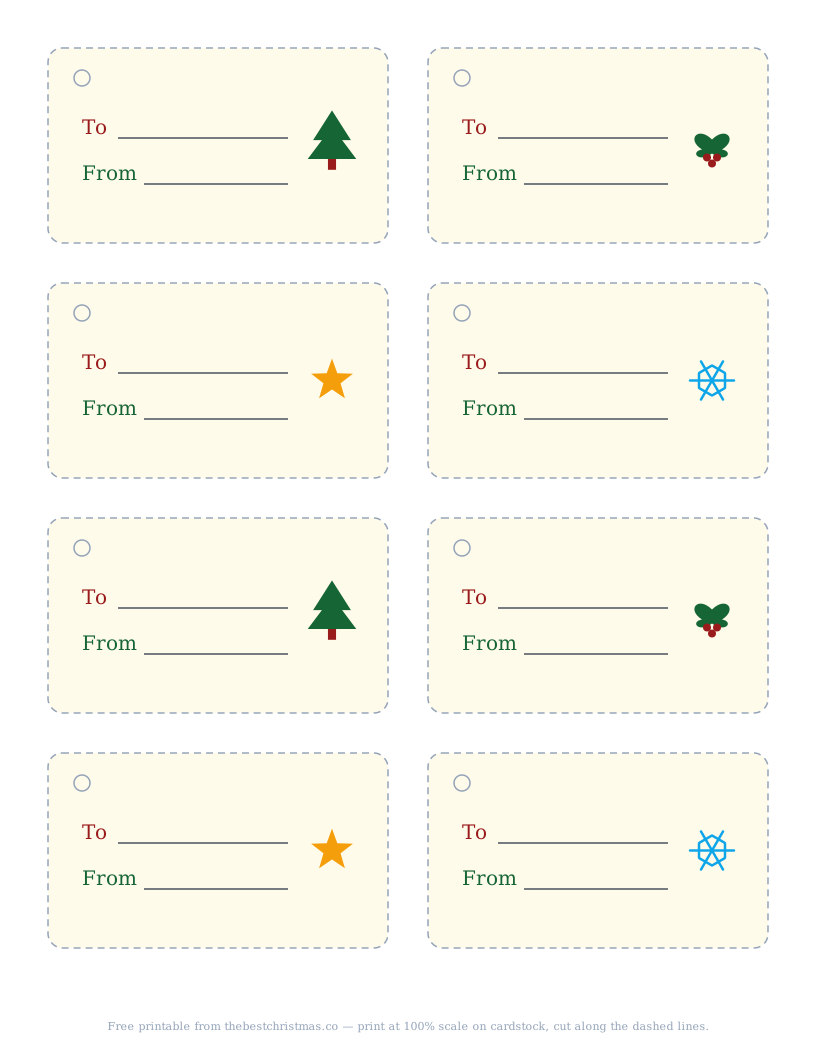
Eight tags on one US Letter page, in four designs that repeat twice: a green Christmas tree, a sprig of holly with red berries, a gold star, and a blue snowflake. Each tag has a marked hole position, a To line, and a From line, on a warm cream background with a dashed cutting border.
The file is a vector SVG, which means it prints crisply at any size — including if you scale it down to make small tags for cookie boxes, or up for large parcels. It has no watermark, no logo on the tags themselves, and nothing to sign up for.
How to Print and Cut Them
Step 1: Load the Right Paper
Cardstock between 65 lb and 110 lb is ideal. Regular printer paper works in a pinch but the tags will curl and tear at the hole punch by the time the gift is under the tree. Check your printer's manual for the heaviest stock it handles — most home inkjets manage 80 lb comfortably from the rear tray.
Step 2: Print at 100% Scale
This is the step that goes wrong most often. In the print dialog, set scaling to 100% or Actual size — not "Fit to page," which shrinks everything by a few percent and throws off the cut lines. Set margins to none or minimum. Print one test page before committing a stack of cardstock.
Choose "high quality" or "best" print settings. Draft mode saves ink and makes the colors look washed out, which is exactly the wrong trade for something you're attaching to a present.
Step 3: Cut Along the Dashed Lines
A paper trimmer gives clean, square edges in about a minute per sheet. With scissors, cut the long horizontal lines first to make four strips, then cut each strip in half. Cutting strips before individual tags keeps the edges straighter than freehanding around each rectangle.
Cut just inside the dashed line so no grey dashes remain on the finished tag.
Step 4: Punch and Tie
The small circle in the top-left corner marks the hole position. Punch through it with a standard single hole punch. Thread about six inches of baker's twine or thin ribbon through, fold it in half, and pull the loose ends through the loop for a neat larks-head knot that won't slip off the package.
Ways to Dress Them Up
- Kraft cardstock — the cream background prints as a soft tan, which looks intentional and expensive against brown paper wrapping
- Metallic pen — a gold or silver gel pen on the To/From lines takes ten extra seconds per tag and changes the whole look
- Rounded corners — a corner rounder punch on all four corners makes home-printed tags read as store-bought
- Sprigs and stickers — a small piece of real rosemary or pine tucked under the twine adds scent and texture
- Kids' handwriting — let children fill in the names; the tags are the part of the wrapping people actually keep
Pair Them With Handmade Wrapping
These tags were designed to sit against plain kraft paper. If you want the whole package handmade, our stamped brown paper tutorial takes about twenty minutes and uses the same motifs, and furoshiki fabric wrapping pairs beautifully with a single tag tied to the knot.
Looking for something else to print? Our printable Christmas bucket list is a free one-page checklist of 24 things to do before Christmas morning.
More Christmas craft ideas
Get weekly DIY projects and craft tutorials delivered to your inbox.
🎄 You're in! Check your inbox to confirm.
Something went wrong. Please try again.